Building your first Docker image with Jenkins 2: Guide for developers
Let’s get it right from the start: Containers can take you to horrible, horrible places.
They can be a nightmare to debug and monitor. They can add a layer of complexity and instability to an otherwise stable application. Unless you understand immutability, you can end up trying to fit a square peg in a round hole…or box.
To make things worse, some experiences with Docker in production are less than commendable.
While containers are clearly not the answer to everything, they can be absolutely fantastic.
They usually make shipping and deploying your application much easier. They make consistent testing much, much easier.
Containerising your application is like shoving your app and all its dependencies into a box. Except the box is infinitely replicable. Whatever happens in the box, stays in the box - unless you explicitly take something out or put something in. And when it breaks, you’ll just throw it away and get a new one.
Containers make your app easy to run on different computers - ideally, the same image should be used to run containers in every environment stage from development to production.
This post is your guide for building a Docker image, and then setting up Jenkins 2 to build and publish the image automatically, whenever you commit changes to your code repository.
Get all the code in this guide from: https://github.com/getintodevops/hellonode
Learn how to do this and more on a free training course: https://www.releaseworksacademy.com/courses/best-practices-docker-jenkins
Requirements
To run through this guide, you will need the following:
- To build and run the Docker image locally: Mac OS X or Linux, and Docker installed
- To set up Jenkins to build the image automatically: Access to a Jenkins 2.x installation (you could run it as a container, see instructions here)
Our application
For this guide, we’ll be using a very basic example: a Hello World server written with Node. Place this in a main.js:
// load the http module
var http = require('http');

// configure our HTTP server
var server = http.createServer(function (request, response) {
  response.writeHead(200, {"Content-Type": "text/plain"});
  response.end("Hello getintodevops.com\n");
});

// listen on localhost:8000
server.listen(8000);
console.log("Server listening at http://127.0.0.1:8000/");
We’ll also need a package.json, which tells Node some basic things about our application:
{
  "name": "getintodevops-hellonode",
  "version": "1.0.0",
  "description": "A Hello World HTTP server",
  "main": "main.js",
  "scripts": {
    "test": "echo \"Error: no test specified\" && exit 1",
    "start": "node main.js"
  },
  "repository": {
    "type": "git",
    "url": "https://github.com/getintodevops/hellonode/"
  },
  "keywords": [
    "node",
    "docker",
    "dockerfile"
  ],
  "author": "miiro@getintodevops.com",
  "license": "ISC"
}
Questions? Get a free training course and ask questions in the Releaseworks Academy Slack: https://www.releaseworksacademy.com
Writing a Dockerfile
To be able to build a Docker image with our app, we’ll need a Dockerfile. You can think of it as a blueprint for Docker: it tells Docker what the contents and parameters of our image should be.
Docker images are often based on other images. For this exercise, we are basing our image on the official Node Docker image. This makes our job easy, and our Dockerfile very short. The grunt work of installing Node and its dependencies in the image is already done in our base image; we’ll just need to include our application.
The Dockerfile is best stored with the code - this way any changes to it are versioned along with the actual application code.
Add the following to a file called Dockerfile in the project directory:
# use a node base image
FROM node:7-onbuild

# set maintainer
LABEL maintainer "academy@release.works"

# set a health check
HEALTHCHECK --interval=5s \
            --timeout=5s \
            CMD curl -f http://127.0.0.1:8000 || exit 1

# tell docker what port to expose
EXPOSE 8000
In short, the above Dockerfile instructs Docker to do the following:
- Use the node:7-onbuild image as the base for our image
- Set a label with the maintainer (not required, but good practice)
- Set a health check for the container (for Docker to be able to tell if the server is actually up or not)
- Tell Docker which port our server runs on
Additionally, our image inherits the following actions from the official node onbuild image:
- Copy all files in the current directory to
/usr/src/appinside the image - Run
npm installto install any dependencies for app (if we had any) - Specify
npm startas the command Docker runs when the container starts
Building the image locally
To build the image on your own computer, navigate to the project directory (the one with your application code and the Dockerfile), and run docker build:
docker build . -t getintodevops-hellonode:1
This instructs Docker to build the Dockerfile in the current directory with the tag getintodevops-hellonode:1. You will see Docker execute all the actions we specified in the Dockerfile (plus the ones from the onbuild image).
Running the image locally
If the above build command ran without errors, congratulations: your first Docker image is ready!
Let’s make sure the image works as expected by running it:
docker run -it -p 8000:8000 getintodevops-hellonode:1
The above command tells Docker to run the image interactively with a pseudo-tty, and map the port 8000 in the container to port 8000 in your machine.
You should now be able to check if the server responds in your local port 8000:
curl http://127.0.0.1:8000
Assuming it does, you can quit the docker run command with CTRL + C.
Building the image in Jenkins
Now that we know our Docker image can be built, we’ll want to do it automatically every time there is a change to the application code.
For this, we’ll use Jenkins. Jenkins is an automation server often used to build and deploy applications.
Note: this guide assumes you are running Jenkins 2.0 or newer, with the Docker Pipeline plugin and Docker installed.
If you don’t have access to a Jenkins installation, refer to https://wiki.jenkins-ci.org/display/JENKINS/Installing+Jenkins. Alternatively, run it as a container, see instructions here.
Pipelines as code: The Jenkinsfile
Just like Dockerfiles, I’m a firm believer in storing Jenkins pipeline configuration as code in a Jenkinsfile along with the application code.
It generally makes sense to have everything in the same repository; the application code, what the build artifact should look like (Dockerfile), and how said artifact is created automatically (Jenkinsfile).
Let’s think about our pipeline for a second. We can identify four stages:

We’ll need to tell Jenkins what our stages are, and what to do in each one of them. For this we’ll write a Jenkins Pipeline specification in a Jenkinsfile.
Place the following into a file called Jenkinsfile in the same directory as the rest of the files:
node {
    def app

    stage('Clone repository') {
        /* Let's make sure we have the repository cloned to our workspace */

        checkout scm
    }

    stage('Build image') {
        /* This builds the actual image; synonymous to
         * docker build on the command line */

        app = docker.build("getintodevops/hellonode")
    }

    stage('Test image') {
        /* Ideally, we would run a test framework against our image.
         * For this example, we're using a Volkswagen-type approach ;-) */

        app.inside {
            sh 'echo "Tests passed"'
        }
    }

    stage('Push image') {
        /* Finally, we'll push the image with two tags:
         * First, the incremental build number from Jenkins
         * Second, the 'latest' tag.
         * Pushing multiple tags is cheap, as all the layers are reused. */
        docker.withRegistry('https://registry.hub.docker.com', 'docker-hub-credentials') {
            app.push("${env.BUILD_NUMBER}")
            app.push("latest")
        }
    }
}
That’s the entirety of our pipeline specification for Jenkins. Now, we’ll just need to tell Jenkins two things:
- Where to find our code
- What credentials to use to publish the Docker image
We’ll start by configuring the credentials:
Configuring Docker Hub with Jenkins
To store the Docker image resulting from our build, we’ll be using Docker Hub. You can sign up for a free account at https://hub.docker.com.
We’ll need to give Jenkins access to push the image to Docker Hub. For this, we’ll create Credentials in Jenkins, and refer to them in the Jenkinsfile.
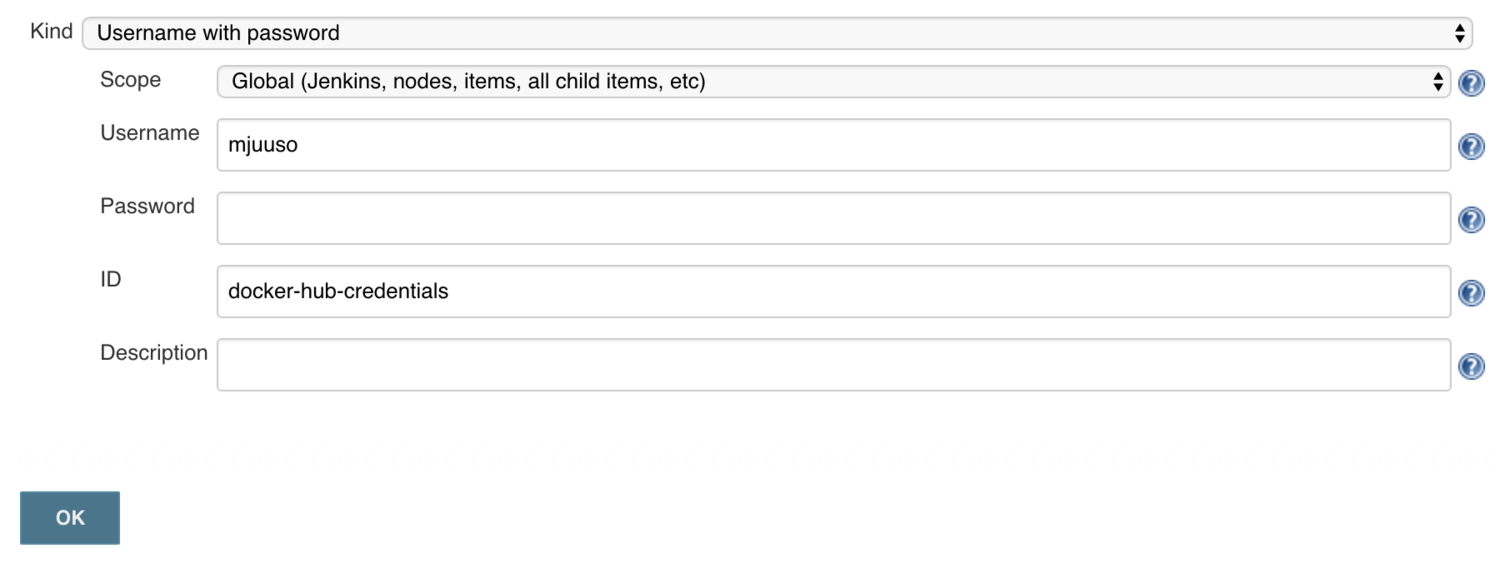
As you might have noticed in the above Jenkinsfile, we’re using docker.withRegistry to wrap the app.push commands - this instructs Jenkins to log in to a specified registry with the specified credential id (docker-hub-credentials).
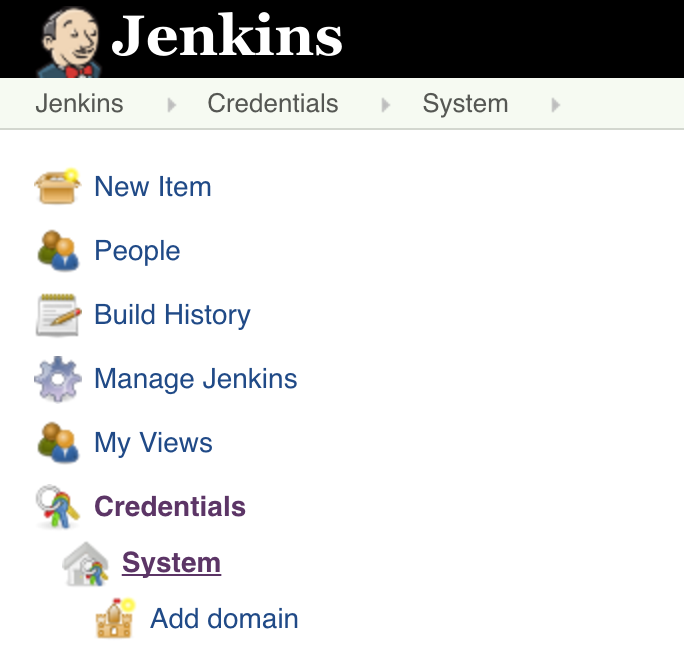
On the Jenkins front page, click on Credentials -> System -> Global credentials -> Add Credentials.
Add your Docker Hub credentials as the type Username with password, with the ID docker-hub-credentials
Creating a job in Jenkins
The final thing we need to tell Jenkins is how to find our repository. We’ll create a Pipeline job, and point Jenkins to use a Jenkinsfile in our repository.
Here are the steps:
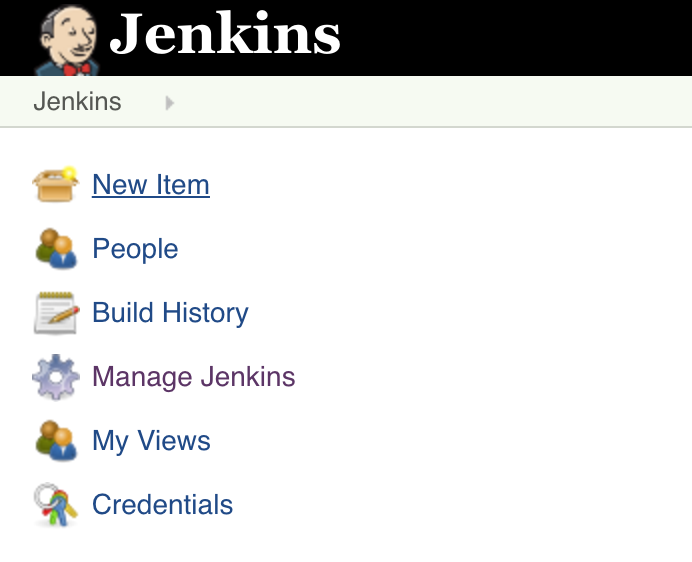
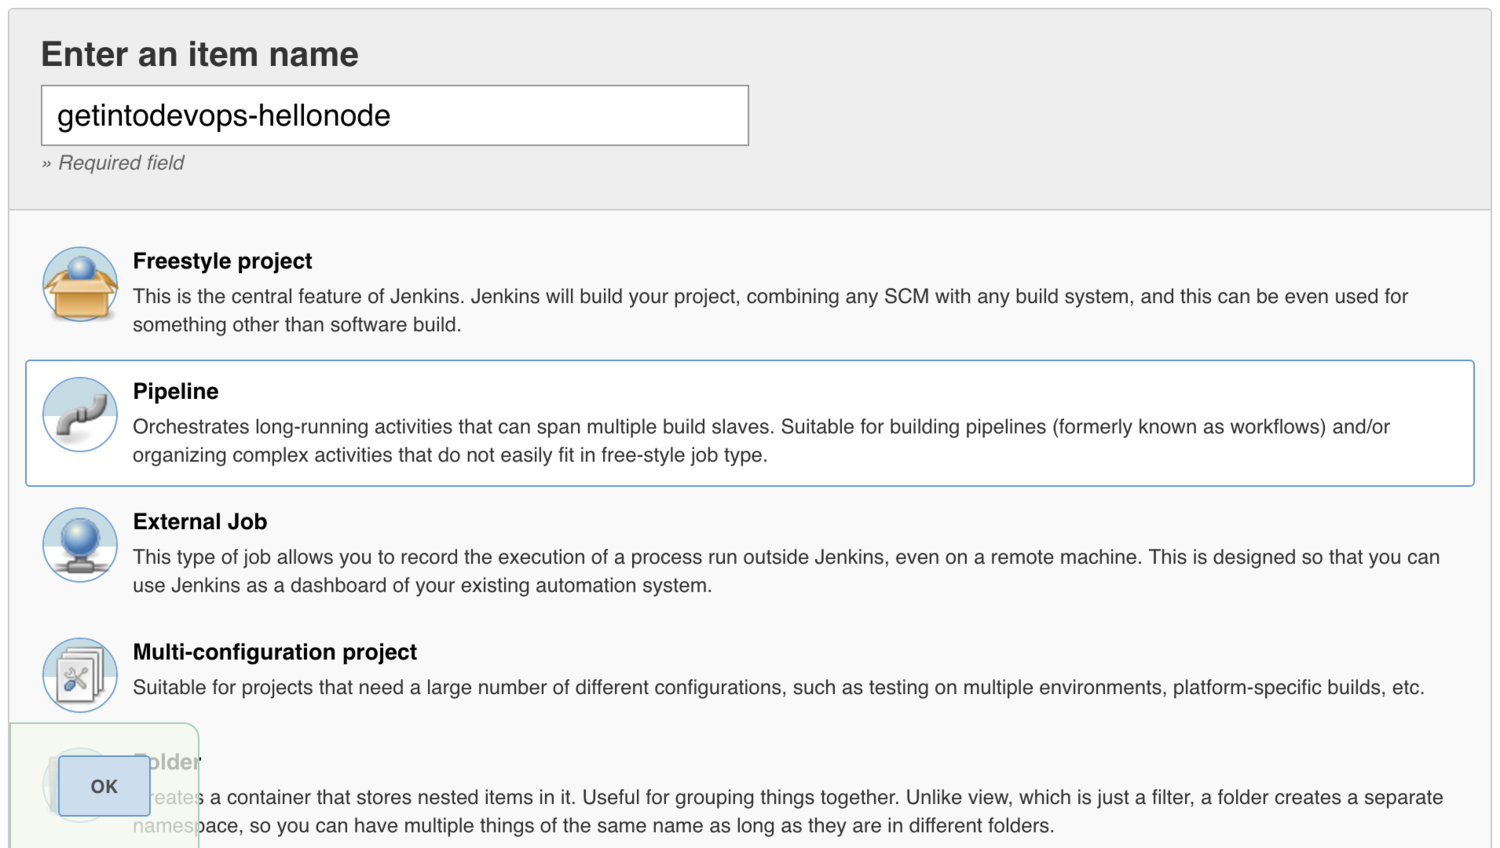
Click on New Item on the Jenkins front page.
Type a name for your project, and select Pipeline as the project type.
Select Poll SCM and enter a polling schedule. The example here, H/5 * * * * will poll the Git repository every five minutes.
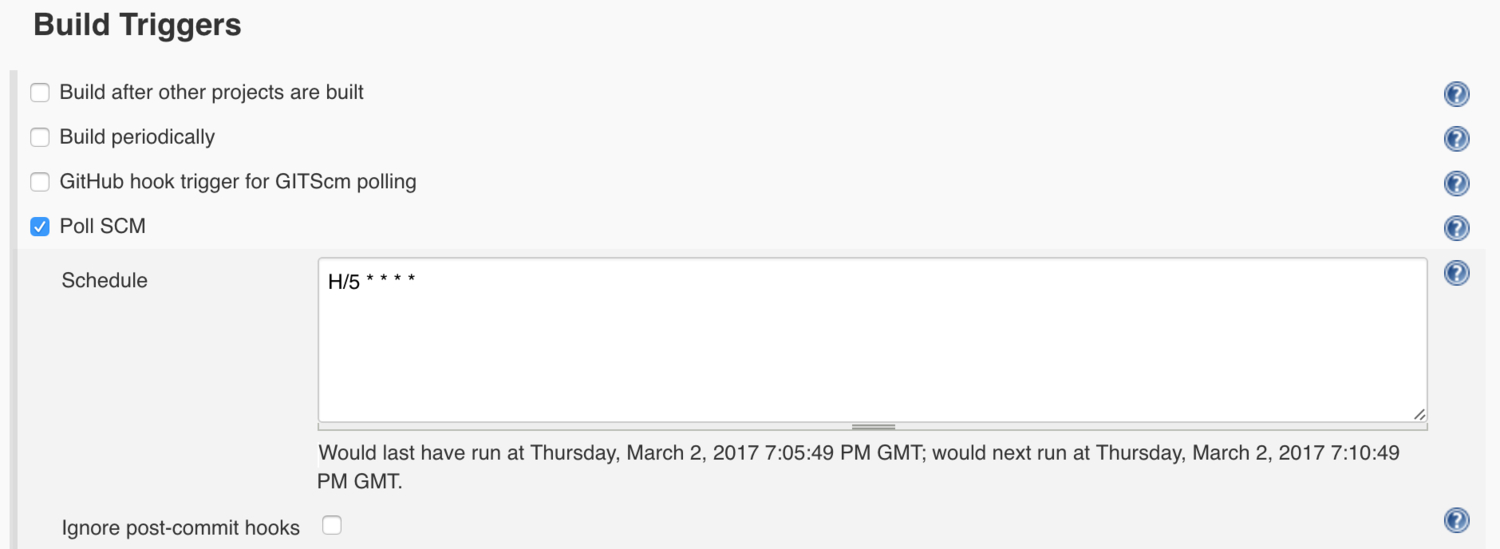
Note that I am polling for changes in this example because I am being lazy. If your code repository is in GitHub, a much better approach is to set up webhooks.
For the pipeline definition, choose Pipeline script from SCM, and tell Jenkins how to find your repository.

Finally, press Save and your pipeline is ready!
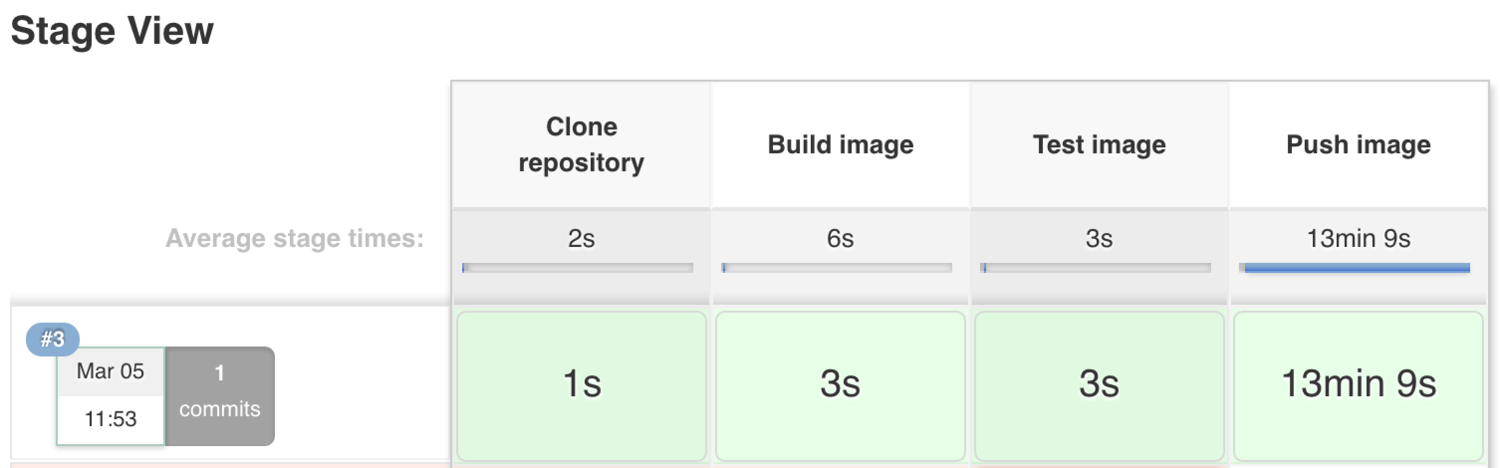
To build it, press Build Now. After a few minutes you should see an image appear in your Docker Hub repository, and something like this on the page of your new Jenkins job:
We have successfully containerised an application, and set up a Jenkins job to build and publish the image on every change to a repository. Great work!
Get our free online training course on Docker & Jenkins best practices: https://www.releaseworksacademy.com/courses/best-practices-docker-jenkins
Next steps
Now that we have set up a basic delivery pipeline, there are a few more things to consider.
Deployment
The next logical step in the pipeline would be to deploy the container automatically into a testing environment. For this, we could use something like Amazon Elastic Container Service or Kubernetes.
Testing
As you might have noticed in the Jenkinsfile, our approach to testing so far is rather non-exhaustive. Integrating comprehensive unit, acceptance and NFR testing into our pipeline would take us much closer to Continuous Delivery.
Monitoring
We’ve already added a health check in our Dockerfile. We should utilise that to monitor the health of the application, and try to fix it automatically if it’s unhealthy. We should also ship all logs from the container somewhere to be stored and analysed.